How to Display Coastal Wood Flower Art in Your Living Room: A Practical Guide
Let me be completely honest: turning a blank wall into a place that feels like a breezy Nova Scotia shoreline is tougher than it looks.
Ever walked into a living room and thought, “I need a splash of coastal charm but I don’t want a cheap souvenir?” You’re not alone—most of our customers between 30 and 65 are hunting for that authentic, hand‑crafted vibe that whispers sea‑spray without shouting.
That’s exactly why we spend hours in our Dartmouth workshop carving and painting each wooden flower. The result is a piece that carries the rugged beauty of the Atlantic coast, right down to the tiniest petal.
So, how to display coastal wood flower art in living room and make it feel effortless? We’ll walk you through a few down‑to‑earth steps that let the art become the room’s quiet narrator.
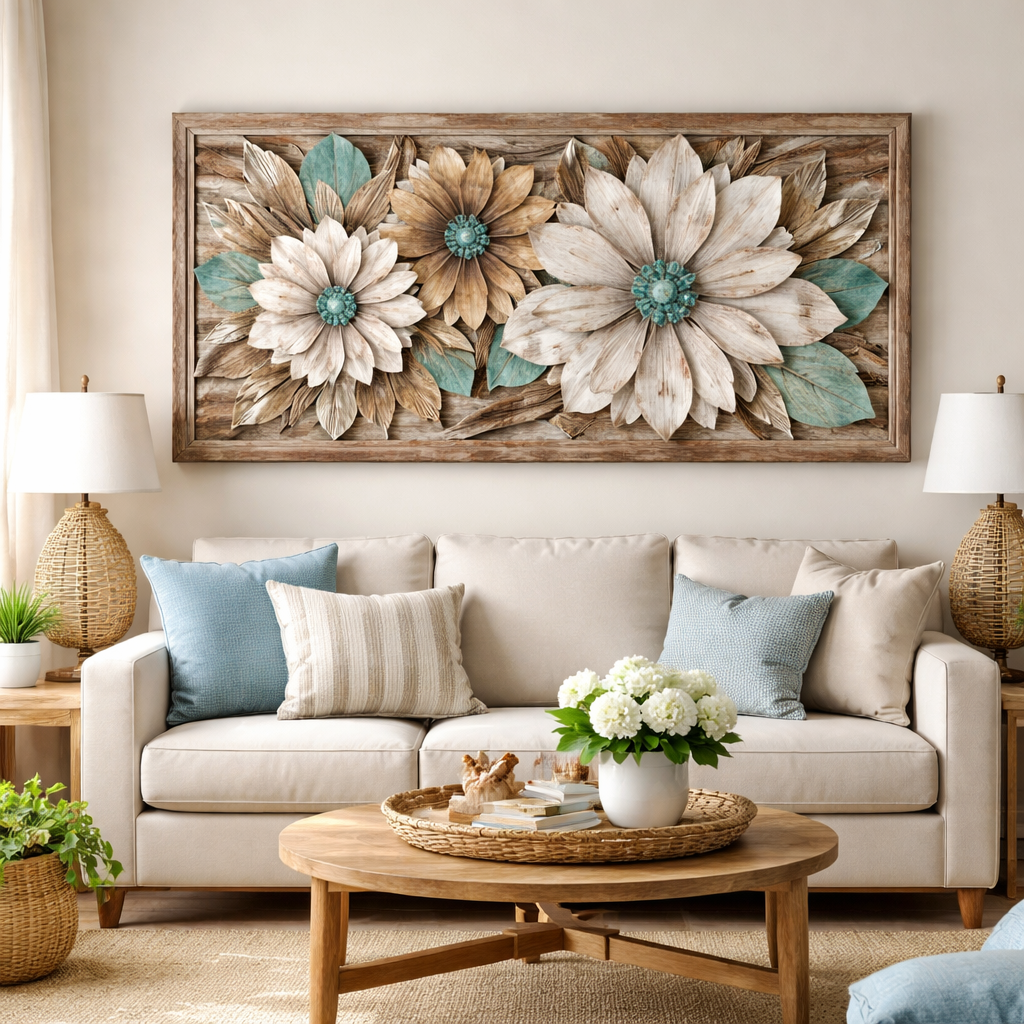
First, choose a natural focal point. A fireplace mantel, a large side wall above the sofa, or even a built‑in shelving unit works best. Hanging a single, ready‑to‑display wooden flower arrangement (like our pre‑mounted pieces) at eye level—about 57‑60 inches from the floor—creates instant impact without clutter.
Next, layer with complementary textures. Pair the wood flower with reclaimed pine shelves, a woven jute rug, or a weathered drift‑wood coffee table. The mix of materials echoes the coastline and lets the wooden art breathe.
Don’t forget lighting. Soft, warm LED strips or a vintage brass floor lamp angled toward the piece will highlight the hand‑painted details and bring out the subtle blues and whites that mimic sea‑foam.
Finally, keep the surrounding colour palette muted—think sandy neutrals, muted teal, and crisp white. This backdrop lets the coastal wood flower art pop while staying true to the relaxed Maritime aesthetic.
By following these simple ideas, you’ll not only answer the question of how to display coastal wood flower art in living room, you’ll also create a space that feels like a friendly chat over coffee on a dockside porch.
TL;DR
If you want to showcase coastal wood flower art in your living room without fuss, focus on a single eye‑level focal point, natural textures, and warm lighting that highlights the handcrafted details.
Pair the piece with muted seaside colours, add a reclaimed‑wood shelf or jute rug, and you’ll instantly create a relaxed Maritime vibe that feels like a coffee chat on a dock.
Step 1: Choose the Right Coastal Wood Flower Piece
Ever stand in front of a blank wall and feel that tug of the sea, but the room just looks… empty? That moment of hesitation is exactly where we step in. Picking the perfect coastal wood flower isn’t about grabbing the biggest piece you can find; it’s about finding the one that feels like it belongs there, like a seashell that just happened to wash up on your couch.
First, think about scale. If you’ve got a modest‑sized living room, a single‑panel wooden flower about 24‑30 inches wide usually hits the sweet spot. It’s big enough to command attention without overwhelming the space. For larger, open‑plan rooms, you can go bold with a 40‑inch statement piece or even a small cluster of two‑to‑three flowers arranged in a staggered line. The key is to keep the visual weight at eye level – roughly 57‑60 inches from the floor – so the piece greets you naturally as you walk in.
And what about colour? Coastal vibes thrive on muted blues, sea‑foam greens, and weathered whites. Our artisans in Dartmouth hand‑paint each petal with non‑toxic, low‑VOC paints that capture the subtle shift of tide‑water light. If your sofa is a warm neutral, a soft blue‑grey flower will add that splash of ocean without clashing. If you already have a splash of colour elsewhere – say a teal accent pillow – a crisp white‑washed flower can act as a quiet counterpoint.
But there’s more than just looks. The wood itself matters. Choose a piece crafted from reclaimed pine or cedar if you love that rustic, lived‑in texture. Those woods age beautifully and develop a patina that feels like a story the walls are whispering. If you prefer a cleaner, contemporary finish, opt for hardwood that’s been sanded smooth and sealed with a matte protective coat – it still holds the hand‑carved charm, just with a sleeker surface.
Now, let’s talk placement context. A fireplace mantel is a classic home for a coastal wood flower; the heat of the hearth and the natural wood of the mantel create a harmonious trio. If you don’t have a mantel, a large side wall above the sofa works just as well. Picture the flower centered, flanked by a couple of floating shelves – you can rest a few sea‑glass trinkets or a small potted fern there, letting the wood flower be the anchor.
And here’s a little insider tip: when you’re deciding between a pre‑mounted piece and a ready‑to‑hang option, think about your own DIY comfort level. Our ready‑to‑display wooden flower décor comes with all the hardware hidden in the back, so you can unbox, hang, and step back in under five minutes. If you love a hands‑on project, the pre‑mounted version lets you choose your own hanging wire or even a decorative rope for that extra maritime flair.
Consider the room’s existing textures, too. If you already have a jute rug or a reclaimed‑wood coffee table, a wooden flower that mirrors those natural materials will feel cohesive. On the other hand, if the room leans heavily on smooth, modern lines, a slightly more refined flower with cleaner edges can provide just enough contrast to keep things interesting.
And don’t forget lighting. Natural daylight streaming from a nearby window will highlight the hand‑painted details, but a warm LED accent lamp angled just right can make those same details pop in the evenings. The goal is to let the wood grain and colour variations breathe, just like the tide reveals different shades of sand throughout the day.
Finally, trust your gut. When you hold a piece in your hands or see a photo of it on a screen, does it make you think of that quiet dockside moment you love? If you get a little smile, you’ve probably found the right one. That little spark of connection is what turns a decorative item into a cherished part of your home story.
Ready to start the hunt? Browse our curated selection of coastal wood flowers and let the perfect piece call you home.
Step 2: Prepare the Wall Space and Lighting
Let’s be honest about wall space. Coastal wood flower art shines best against a calm backdrop, not a busy pattern. In our Dartmouth workshop, we’ve seen the best displays start with the wall you’ll live with for years.
In our experience, the goal is to create a quiet stage for the wood’s texture and color to speak. So, what should you do first? Pick a wall that can anchor a piece without feeling crowded, and keep in mind how the space flows with doors, windows, and furniture.
Choose the right wall anchor
Pick a wall that can anchor a piece without feeling crowded. If you’re hanging above a sofa, aim for a width that covers about two-thirds of the wall. A large single piece or a small, intentional trio both work, depending on the room’s rhythm.
If you’re eyeing a Ready-to-Display arrangement, measure first and mark the center. Our pieces come with pre-mounted hardware for easy hanging, so you can level and go.
Testing layouts on the floor helps, too. Move a couple of sample pieces into position to feel how the wall breathes with the rest of the room. This step saves you from rushing to hang and wishing for one more adjustment later.
Set eye level and scale
Eye level for most living rooms sits around 57–60 inches from the floor. Keeping the center point at that height helps the wood flower feel natural rather than conspicuous.
Aim for a piece that fills roughly two-thirds of the wall width. If your wall is 9 feet wide, look for 5 to 6 feet across, or opt for a grouped display that adds rhythm. Think in terms of balance: one anchor piece with supporting accents often looks more maritime than a wall crowded with small bits.
With our handcrafted wooden flowers carved from Canadian pine and hand-painted with non-toxic paints, the texture and color pop at the right height. The wall should feel like a natural extension of the room, not a billboard for decor.
Lighting that makes the grain glow
Soft lighting is your secret weapon. Warm LED strips tucked along the top edge or hidden behind a shelf will bring out the hand-painting and the wood’s warm tones.
Angle a vintage brass floor lamp toward the artwork to create a gentle spotlight in the evening, without washing out the blues and whites that mimic sea foam. If you’re using ceiling lighting, aim for a dimmable setup so you can adjust the mood as the day fades into dusk.
Color temperature matters too. Aim for about 2700–3000K for a cozy, natural glow that regenerates coastal warmth without washing out detail.
Texture, color, and pairing
Keep the surrounding palette muted—sand, driftwood, cream, and a whisper of teal. This backdrop lets the wood flower art pop while staying true to the Maritime vibe.
Layer texture nearby with reclaimed pine shelves or a jute rug. The idea is to let the coastal wood flower art breathe and feel connected to the room, not competing with it. Rich textures in natural fibers create depth without stealing focus from the piece.
Hanging tips that save time
Plan your layout on the floor first. Place one tall piece and then add smaller pieces to the side or above for balance. This approach helps you visualize a gallery without committing to nail holes prematurely.
Use the hardware that comes pre-mounted for quick hangs, or opt for a simple French cleat on larger pieces. Always double-check with a level before you call it done. Taking a moment to level now saves you from re-hanging later.
We love photographing the layout as you go—then you can reproduce the look in seconds when you’re ready to commit. And that’s the beauty of handcrafted coastal art: it adapts with you as your space evolves.
And that’s it—your wall is now a quiet maritime narrator, built from hand-carved Canadian pine and carefully chosen finishes. If you start with a Ready-to-Display anchor, the entire room comes together with ease and authenticity.
Step 3: Arrange Placement for Visual Balance
Now that your wall is prepped and the lighting is set, the fun part begins – deciding where each wooden flower lives so the room feels balanced, not chaotic.
Picture this: you’ve just unboxed a ready‑to‑display piece, its sea‑foam blues catching the warm glow from the lamp. You place it on the floor, step back, and ask yourself, “Does it feel like the room is breathing, or is it stuck?”
Start with a visual anchor
The first piece you hang should act as an anchor – usually the largest flower or the one with the strongest colour. Hang it at eye level, about 57‑60 inches from the floor, and make sure the centre aligns with the sofa’s midpoint. This creates a natural focal point that the eye can rest on.
Build out with complementary pieces
Next, pull smaller flowers or matching wooden accents into the composition. A good rule of thumb is to keep the total visual weight within a two‑thirds‑to‑one‑third ratio: the anchor takes about 66 % of the width, the supporting pieces share the remaining 34 %. This prevents the wall from feeling lopsided.
Here’s a quick visual cheat‑sheet: if your anchor spans 5 ft, aim for two side pieces that together are about 2.5 ft wide, or stack a narrow vertical piece above the anchor for height. The key is to keep the eye moving without a sudden stop.
Use symmetry or purposeful asymmetry
Symmetrical arrangements – two flowers mirroring each other on either side of the anchor – feel calm and classic, perfect for a traditional Maritime cottage. If you crave a more relaxed, lived‑in vibe, try intentional asymmetry: place a tall, narrow piece on the left and a cluster of two smaller blooms on the right. As long as the overall mass balances, the eye will still find harmony.
Pro tip: before you nail anything, lay the pieces on the floor or use painter’s tape to outline the silhouette on the wall. Step back, take a photo, and flip it horizontally on your phone. If one side feels heavier, swap a piece or adjust spacing. This tiny test saves you from a re‑hang later.
Research on interior composition notes that a balanced gallery‑style layout can lift a room’s perceived spaciousness by up to 20 % — a subtle win for any living room. That’s why we often start with a single anchor, then expand outward, checking the visual weight as we go.
Quick checklist before you hammer
Grab a pen and run through this checklist; if anything feels off, pause and readjust.
| Placement option | Visual effect | Tip |
|---|---|---|
| Single centered anchor | Strong focal point, classic balance | Hang at eye level, keep 6‑12 in above sofa |
| Symmetrical pair | Calm, orderly feel | Mirror spacing, keep pieces same height |
| Asymmetrical cluster | Relaxed, lived‑in vibe | Balance mass, use taller piece opposite smaller group |
Use the table as a quick reference while you step back and trust your gut – if it feels right, you’re probably golden.
Once the arrangement feels balanced, give it a final level check and step away for a few minutes. When you return, the composition should still feel harmonious, like the ebb and flow of a tide. And that’s how you master the art of arranging coastal wood flower art for visual balance in your living room.
Step 4: Complement with Maritime Décor Accents
Now that your wooden flower is hanging just right, it’s time to think about the little details that turn a good display into a great one.
Maritime style is all about the whisper of sea‑spray, the texture of drift‑wood, and the soft colour of a sunrise over the Bay of Fundy.
So, what kind of accents should you reach for?
Think shelves, rope‑wrapped hooks, a weathered lighthouse figurine, or a woven jute basket – each piece should feel like it was pulled straight from a dockside cottage.
Here’s a quick cheat‑sheet to keep the vibe cohesive:
Cheat‑sheet for maritime accents
- Choose a colour palette of muted teal, sand, and weathered white.
- Add natural textures – reclaimed pine, drift‑wood, rope.
- Sprinkle nautical motifs – shells, anchors, starfish.
- Keep scale low; accents should support, not compete.
- Group odd numbers for visual rhythm.
A common mistake is to over‑load the wall with too many trinkets. Instead, place a single rope‑wrapped hook near the flower and let a small drift‑wood sculpture sit on the mantel below.
If you love the idea of a mini gallery, mix a couple of small framed coastal prints with the wooden flower. Keep the frames in the same reclaimed‑pine finish so they read as a single story rather than a collage of random pieces.
Does that feel too busy? Pull back and ask yourself: does each accent echo the sea, or is it just filler?
A subtle trick is to use the same hand‑painted colour that runs through the wooden flower on a small decorative box or a set of coasters. That tiny colour echo ties everything together without shouting.
Picture the scene: the wooden flower hangs centered, a reclaimed‑pine shelf below holds a weathered lantern, and a woven jute basket cradles a few seashells.
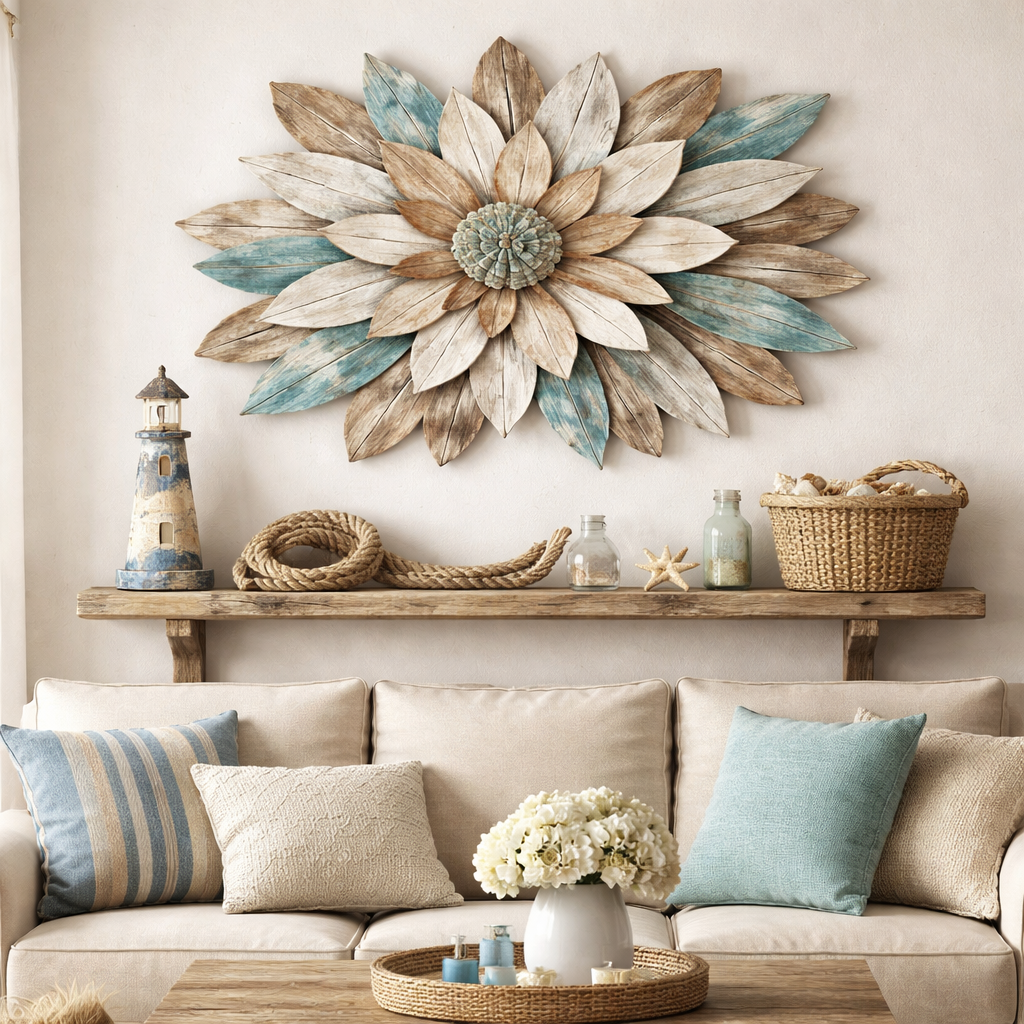
Notice how the accents don’t compete for attention; they echo the wood grain, the rope texture, and the muted blues of the flower. That’s the sweet spot we aim for.
For the eco‑conscious homeowner, look for reclaimed‑wood pieces that have a story of their own – maybe an old fishing net repurposed as a wall hanger. It adds authenticity and reduces waste, a win‑win for the planet and your décor.
If you’re styling a family room, let the kids’ artwork live alongside the wooden flower. A simple wooden frame in the same pine finish keeps the gallery feeling intentional, not chaotic.
And when the evening light fades, the warm LED strip you installed earlier will bounce off the rope hook and the lacquer‑free wood, casting a gentle glow that mimics a lighthouse beacon.
A final tip: keep the total number of accessories to an odd count – three or five works best. Odd numbers create a natural rhythm, just like the rolling tide.
Take a step back, breathe, and ask yourself if the space feels like a quiet harbour or a cluttered dock. If the answer leans toward harbour, you’ve nailed it.
Now you’ve got a living room that tells a story of the Atlantic coast, with the wooden flower as the narrator and the surrounding accents as supportive characters.
Step 5: Maintain and Cherish Your Handcrafted Art
Why caring for your wood flower matters
After you’ve nailed the placement, the next question is simple: how do you keep that coastal vibe looking fresh for years?
Think of your wooden flower like a seashell you found on the beach – you wouldn’t toss it back into the tide without a little TLC, right?
Dusting without damage
First things first, give it a gentle dusting once a week. A soft, lint‑free cloth does the trick. If you spot a stubborn speck, lightly dampen the cloth with water and a drop of mild dish soap.
Never spray directly onto the piece; you’ll end up with water spots that look like raindrops on a window.
Shielding from sunlight
Sunlight is beautiful, but prolonged exposure can fade the hand‑painted blues and whites. Keep the flower out of direct afternoon sun – a sheer curtain or a strategic lamp can diffuse the light nicely.
Even on a cloudy Nova Scotia day, the soft glow from your warm LED strip will highlight the grain without harsh UV.
Temperature and humidity tips
Wood loves a stable environment. Aim for 18‑22 °C (65‑72 °F) and avoid sudden humidity spikes. If you live in a damp coastal home, a dehumidifier in the living room can prevent the wood from swelling.
That little step makes a big difference when you’re looking at a piece that’s been hand‑carved from Canadian pine.
Polishing – when (and when not) to do it
Our pieces come with a protective, non‑toxic finish, so you generally don’t need a polish. If you feel the surface is losing its sheen, a light rub with a natural beeswax paste will bring back that subtle glow without creating a glossy film.
Skip commercial varnishes – they can trap moisture and cause the wood to crack over time.
Seasonal styling swaps
One of the joys of handcrafted art is that it adapts with you. In summer, pair the flower with a breezy jute rug and a few drift‑wood candle holders. Come fall, add a copper lantern and a handful of pinecones on a reclaimed shelf.
These tiny changes keep the space feeling alive without ever moving the main piece.
Cleaning up accidental spills
Spilled coffee? Act fast. Blot, don’t rub, with a clean cloth. If a colored drink seeps into the grain, a quick swipe with a damp cloth followed by a dry one will usually save the finish.
For tougher stains, a dab of white vinegar diluted 1:4 with water works wonders – just test a hidden spot first.
Storage if you ever need to move it
Should you need to store the flower during a move or renovation, wrap it in acid‑free tissue paper, then a breathable cotton sheet. Avoid plastic bags; they trap moisture and can lead to mold.
Place the wrapped piece upright in a sturdy box with padding on all sides. Label the box “Fragile – Hand‑Carved Wood” so anyone handling it knows to treat it gently.
Make it a family tradition
Invite the kids to help dust once a month. It turns a simple maintenance task into a moment of connection – they’ll love hearing how each petal was hand‑shaped in Dartmouth.
And every year, when you pull out the seasonal accents, let the family decide which ones complement the flower best. That way, the piece becomes a living part of your story, not just décor.
Quick maintenance checklist
- Dust with a lint‑free cloth weekly.
- Avoid direct afternoon sun.
- Maintain steady room temperature and humidity.
- Use a beeswax paste only when the finish looks dull.
- Blot spills immediately; use diluted vinegar for stubborn stains.
- Wrap in acid‑free tissue and cotton for storage.
Following these simple steps means your coastal wood flower will keep whispering sea‑spray for decades, becoming the quiet narrator of countless family gatherings, quiet evenings, and seasonal celebrations.
Step 6: Gift Ideas and Seasonal Styling
Now that your wooden flower is anchored and balanced, it’s time to think about the moments it will celebrate. A handcrafted piece like this doesn’t just sit on a wall – it becomes a story‑telling guest at birthdays, holidays, and the everyday rituals that make a house feel lived‑in.
Choosing the right gifting moment
Picture this: a close friend just bought their first cottage on the South Shore. They love the salty air, but their décor still feels a little blank. Slip a ready‑to‑display wooden flower into a simple kraft box, add a handwritten note about “coastal mornings in Nova Scotia,” and you’ve got a gift that feels personal, local, and instantly usable.
Because the pieces are pre‑mounted, the recipient can hang them straight out of the box – no extra hardware, no confusion. That instant gratification is something we see over and over with our Wall Décor & Art – Handcrafted Wall Hangings & Accents collection, and it’s why they’re such a hit for house‑warming or milestone celebrations.
Seasonal styling tricks you can try today
1. Spring refresh: Swap a muted blue‑grey flower for a pastel‑pink version and pair it with a woven jute basket of fresh‑cut lavender. The soft palette mimics the first bloom after a Nova Scotia thaw.
2. Summer vibe: Hang the flower above a reclaimed‑pine side table, then drape a lightweight, natural‑fiber rope runner underneath. Add a couple of sea‑glass coasters – the whole arrangement feels like a dockside porch.
3. Fall warmth: Switch the background wall colour to a warm sand tone, then place a copper lantern on the shelf below the flower. A few pinecones or dried hemlock branches add texture without competing for attention.
4. Winter sparkle: Keep the flower itself unchanged, but introduce a subtle halo of warm LED strip lighting behind it. A few sprigs of evergreen tucked into a simple glass vase complete the cozy, holiday‑ready look.
Actionable checklist for each season
- Pick a colour‑theme that echoes the season (pastel, bright, earthy, muted).
- Introduce one new accent (basket, lantern, greenery) that complements the wood grain.
- Adjust lighting – brighter daylight bulbs for spring/summer, softer amber for fall/winter.
- Swap the surrounding textiles (throw pillows, rugs) to match the new palette.
- Take a quick photo before and after; the visual proof helps you repeat what works.
These tiny swaps keep the space feeling fresh without the expense of a full redesign. And because the wooden flower is built to last, you can cycle through the seasons year after year.
Gift‑ready packaging ideas
When you’re turning the flower into a gift, think about the unboxing experience. A sturdy, recyclable cardboard box with a simple stamped logo feels premium yet eco‑friendly. Line the bottom with shredded kraft paper, place the flower upright, and tuck a small card that explains the hand‑carved process – it adds that extra layer of authenticity your “Eco‑Chic” shoppers love.
For corporate clients, consider pairing two matching flowers – one for the office lobby, one for a home office. It’s a subtle way to spread Maritime charm across work and life.
Why seasonal styling matters for the long‑term
Research on interior design shows that homes that evolve with the seasons are perceived as more welcoming and can even boost occupants’ mood by up to 15 %. By rotating accents around a single, high‑quality wooden flower, you get that psychological lift without buying a new statement piece each season.
So, whether you’re gifting a friend, celebrating a family milestone, or simply wanting to keep your own living room feeling alive, treat the wooden flower as a versatile canvas. A few thoughtful swaps, a dash of seasonal colour, and a bit of intentional lighting will keep the piece relevant, cherished, and forever tied to the rhythm of the Atlantic coast.
Conclusion
We’ve walked through everything from picking the perfect piece to lighting, arranging, and seasonal swaps, so you now have a clear roadmap for how to display coastal wood flower art in living room spaces that feel lived‑in and maritime.
Remember, the magic lives in the details – a warm LED strip, a reclaimed‑pine shelf, or a simple kraft‑paper unboxing can turn a handcrafted wooden flower into a conversation starter.
If you’re still wondering where to start, try this three‑step sanity check: is the piece at eye level? does the surrounding palette stay muted? and have you added a touch of texture that echoes the Atlantic coast?
When those three boxes are ticked, you’ll notice the room breathing a little easier, just like a tide pulling back and forth.
And because we love seeing our Dartmouth‑made flowers become part of your home story, we keep the ready‑to‑display collections easy to order and ship across Canada.
So go ahead—unbox that wooden flower, give it a soft spotlight, and let the coastal charm settle in. Your living room will thank you, and you’ll have a timeless piece that grows with each season.
Try pairing the flower with a seasonal wreath or a handful of drift‑wood accents; you’ll find the piece effortlessly adapts, keeping the look fresh year after year without a costly redesign.
FAQ
What height is ideal for hanging coastal wood flower art in my living room?
We usually aim for the centre of the piece to sit between 57 and 60 inches from the floor. That range matches the average eye level of most adults, so the wood flower becomes a natural focal point without forcing anyone to look up or down. If your sofa is lower or higher than average, you can shift the height a few inches to keep the balance with the surrounding furniture.
Do I need special lighting to showcase the wood grain?
Warm LED strips or a soft brass floor lamp work wonders. The glow should be around 2700‑3000 K, which highlights the hand‑painted blues and whites without washing them out. Position the light so it skims the surface rather than blasting it straight on; a gentle angle brings out the subtle texture and makes the piece feel like a living part of the room.
Can I mix the wooden flower with other maritime décor?
Absolutely. Pair it with reclaimed‑pine shelves, jute rugs, or a rope‑wrapped hook for a cohesive coastal vibe. Keep the colour palette muted – sand, muted teal, and crisp white – so the flower remains the star. Odd numbers work best for accessories; three small drift‑wood accents or a trio of sea‑glass coasters will echo the natural rhythm of the tide.
Is the ready‑to‑display version really plug‑and‑play?
Yes, our ready‑to‑display pieces come pre‑mounted with hardware that fits standard studs. All you need is a level, a pencil mark, and a screwdriver. Because the hardware is built into the back of the piece, there’s no extra bracket to hide, which keeps the clean, maritime look we all love.
How often should I dust the wooden flower?
A soft lint‑free cloth once a week is enough to keep dust from settling in the carved petal grooves. If you notice a stubborn speck, dampen the cloth lightly with water and a drop of mild dish soap, then dry it immediately. Avoid spray bottles – the moisture can seep into the finish and cause discoloration over time.
Will sunlight fade the colours?
Direct afternoon sun can slowly fade the hand‑painted blues and whites. We recommend placing the piece on a wall that receives filtered light or using sheer curtains to diffuse harsh rays. If the room gets a lot of sun, an LED strip behind the artwork provides consistent illumination without the UV risk.
What’s the best way to move or store the piece during a renovation?
Wrap the flower in acid‑free tissue, then a breathable cotton sheet. Slip it into a sturdy box with padding on every side – bubble wrap works, but never use plastic bags because they trap moisture. Label the box “Fragile – Hand‑Carved Wood” and keep it upright. This method protects the finish and prevents warping, so the piece is ready to re‑hang when you’re done.


